A few posts ago I mentioned that perhaps people were less interested in reading about my predominately Burda sewing and I was happy to receive lots of feedback which was in two categories. Those who sew already from Burda and are happy to see patterns made up, and those who are just interested in my sewing, whatever the pattern. I got to thinking - perhaps there is a third category - people who would like to try Burda magazine but are not sure how the patterns work.
If you are interested or just want to get an explanation of those pattern sheets, read on! Here are a few of my favorite Burda patterns.

Diving in, here is the pattern I've decided to use an an example of how to find and trace. I don't know if I will get around to making it, and I like the ruffle version ( which is 104) but it might just be a bit too ruffly for me. It's Pattern 103 from the May 2020 issue. They generally mention having one designer pattern, I suppose from a German designer, the one in this issue is really pretty and perfect if you like the statement sleeve look.


First thing I always look at is the "All Styles at a Glance" pages. It shows you the line drawing for each item, categorized by dresses, tops, pants, etc. I refer to these constantly! In fact I have the Russian end of year summary page bookmarked on my iPad and in idle moments when I want to make something I scroll through and look at various months (which I have looked at a zillion times already) and often find just what I had in mind! They also have a double page at the front which is the photos of all the patterns, but I find the line drawings so much more useful to look at. Look at all those cute dresses - when will I get time for those ?
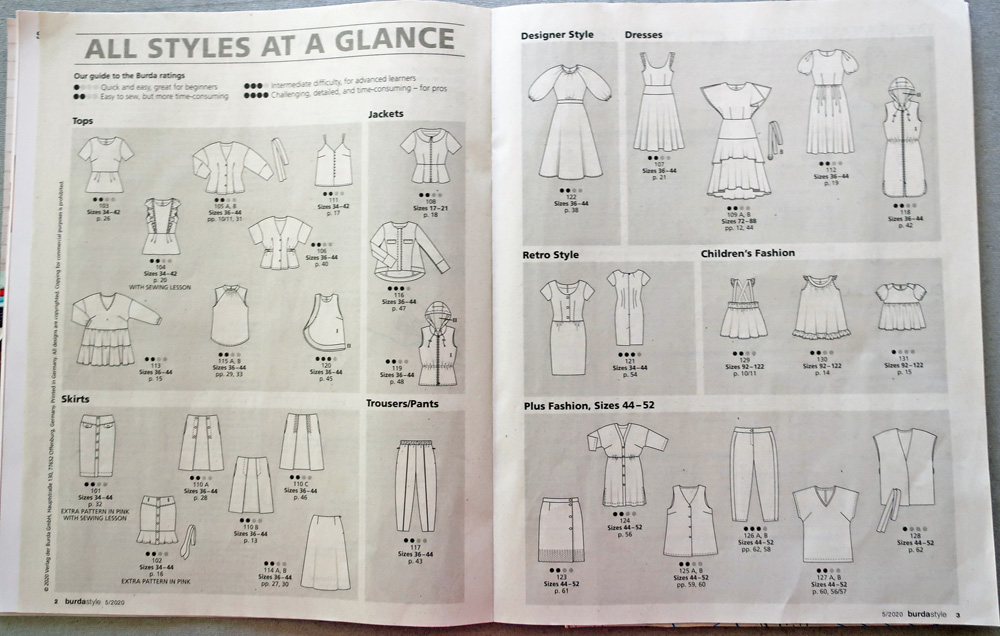
Once I've decided on what to sew, then the task of tracing starts. The pattern drawings, size info, yardage and cutting, plus the instructions are then in the following pages. Yes - the instructions are sparse but after a couple of years I've realized that they are reasonable complete and if you've traced the markings they provide then they work.
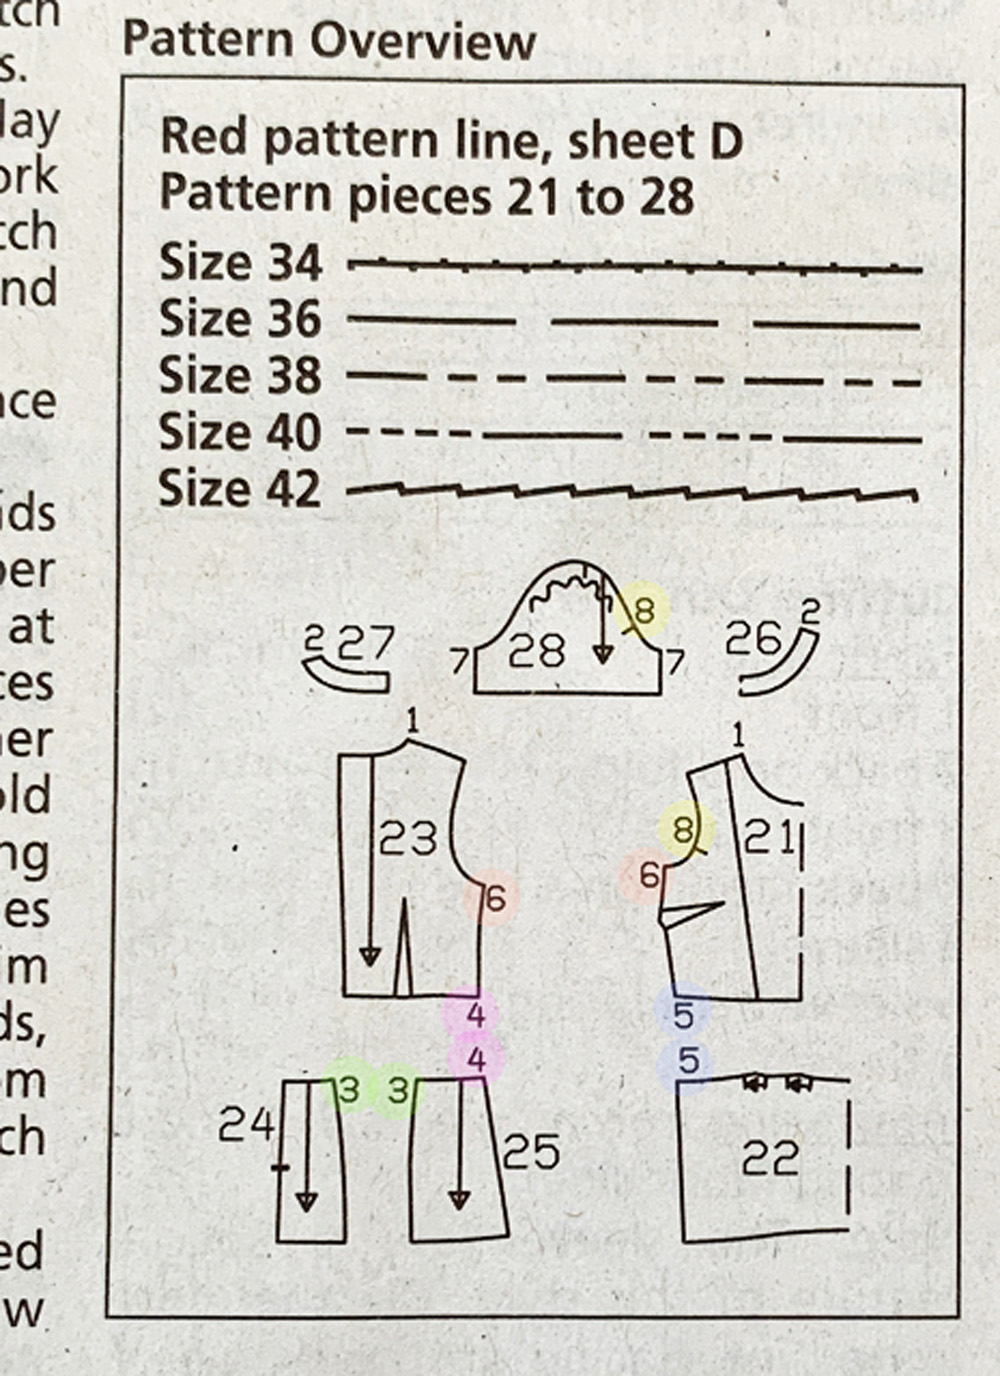
Here's the detail for this pattern No. 103 Blouse. It shows front and back line drawing, tells you which pattern sheet to find it (Sheet D, red lines), and the sizes available plus tracing lines for each size. It gives you the diagram of the pattern pieces (showing grainlines and notches) and then yardage requirements. It tells you how many to cut of each pattern piece and whether on the fold. Then the instructions follow. As it happens for this pattern the cutting layout is continued on the next page in the magazine so I couldn't get it into this photo, but it's there, see the next photo.


I do find it useful to look at the cutting layout, whether or not I plan to use it because invariably - and this applies to any pattern brand - I sometimes overlook a pattern piece and realize that when I see the cutting layout.
The next step is to unfold the pattern sheet and find the Sheet D. They come as one very large sheet, with Sheet A and B on one side and Sheet C and D on the other side. They indicate a cut line in the middle and I alway cut into two sheets as shown which are a lot easier to manage.

Then I run a dry iron over the pattern sheet. I find paper irons so well, I iron all patterns I get, as it makes them easier to work with, and takes away all those little folds and crumples that will change the measurements. At this point don't panic about the jumble of lines you see on the sheet.


Here's sheet D, and we'll be looking for Red pattern pieces. Each sheet has the Month/Year on the sheet which is handy as I tend to separate them from the magazine (unintentionally) and if they weren't labeled that would be a problem.
Next step is to circle all the pattern piece numbers that I'm going to trace. All the pattern piece numbers for an individual pattern are on one side of the sheet. I keep the magazine instruction sheet on my work surface and just go down the list of pattern pieces. I find it helpful to go in order, as it just works to make sure you get them all circled.
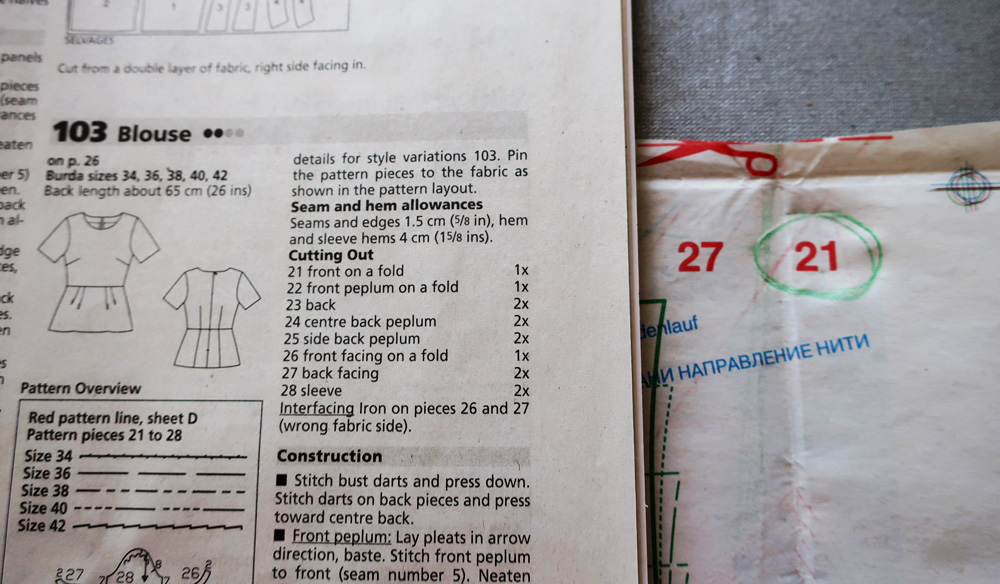
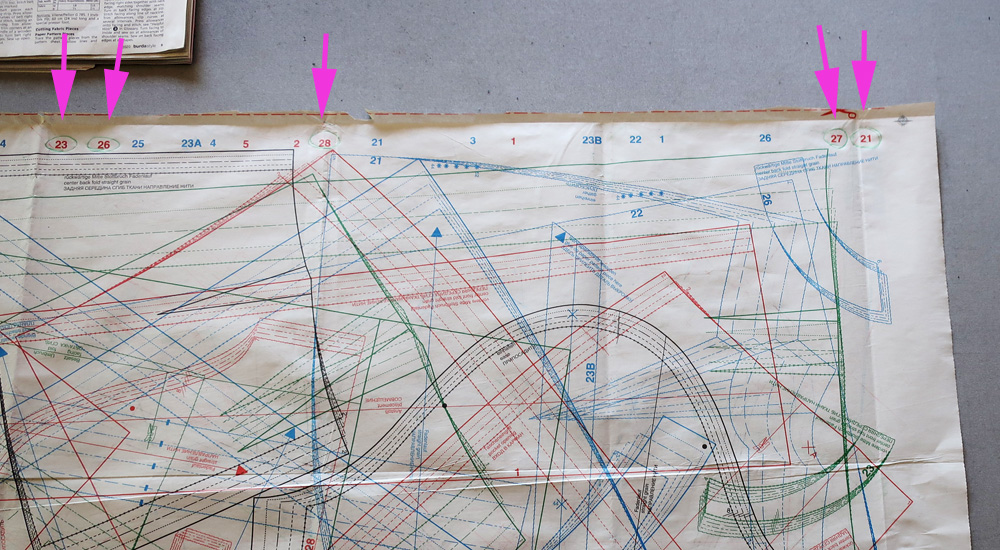
So here they are, circled and ready to find and trace. Note that on that edge of the pattern sheet there are other red numbers (I see numerals 5, 2 and 1) which indicates there is another pattern with red lines also on this sheet. It may look like a jumble at this point but there is a bit of method to the way the whole thing is printed - stay with me.
Now here's the thing that one day I realized (and Burda veterans probably laughing at me now). The pattern piece number on the edge is DIRECTLY above the pattern piece number in the sheet. So you can just go straight down until you hit the number, and then there is the pattern piece. I'm not saying it's always easy to find the whole pattern piece outline, but this really helps. Also the pattern piece number is generally along the bottom or center fold of the pattern piece, so that's another help. They put the number in a spot that is not along a size variation edge. Here I've outlined in yellow our pattern piece 28, with the number 28 along the bottom edge. I've also shown Blue pattern piece 3 highlighted in green, and you can see that piece is straight below the numeral 3. Puzzle - can you see where 26 and 5 are straight below their edge numbers?

Now let's zoom in this pattern piece 28, which happens to be the sleeve. I've shown it here on the sheet, and then outlined it yellow. After a while the pattern pieces start to jump out at you, once you get the pattern piece number located in the middle of the sheet. I find that the other colors of pattern pieces tend to recede in my mind and I am focus on the ones I am looking for. It's a bit like doing a puzzle - which is quite the popular pastime these days, right?

I think everyone is accustomed to tracing patterns, or at least has done it a few times with an expensive pattern. It's a matter of finding the size lines and tracing. The important thing with Burda is to make sure and catch all the notch markings, although there aren't a lot.
My number one tip for tracing is to pin the tracing paper to the pattern sheet, in two places. The reason for this is that it can't then shift when you are tracing and mess up all your work.
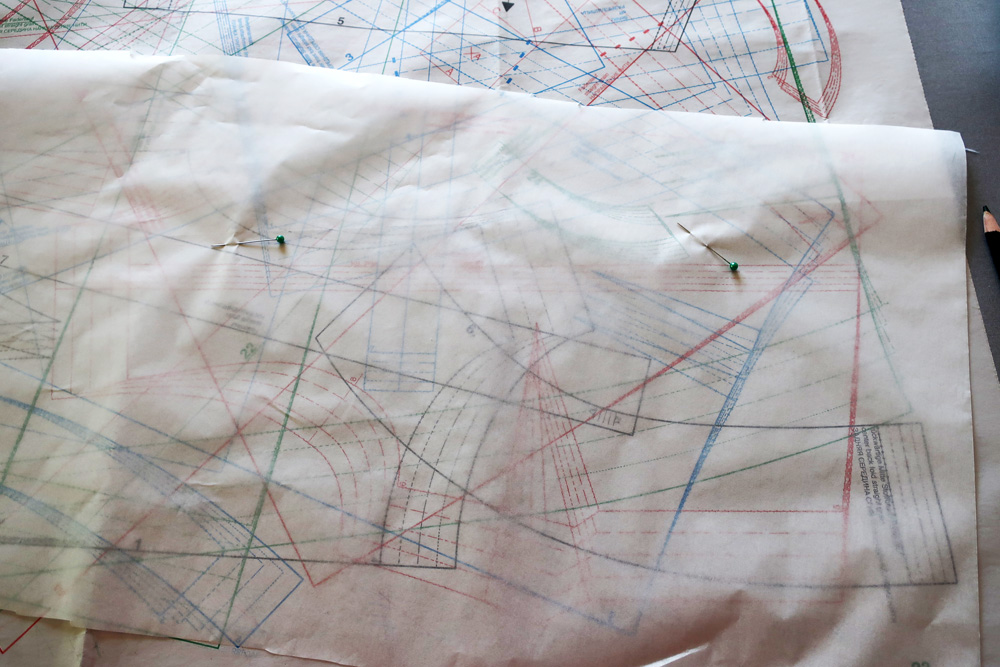
Burda is fairly minimalist in their pattern markings but they always include grain line, a notch for the front armhole/sleeve, pleats and gathers, and then some numbers which at first eluded me but now I realize are invaluable.
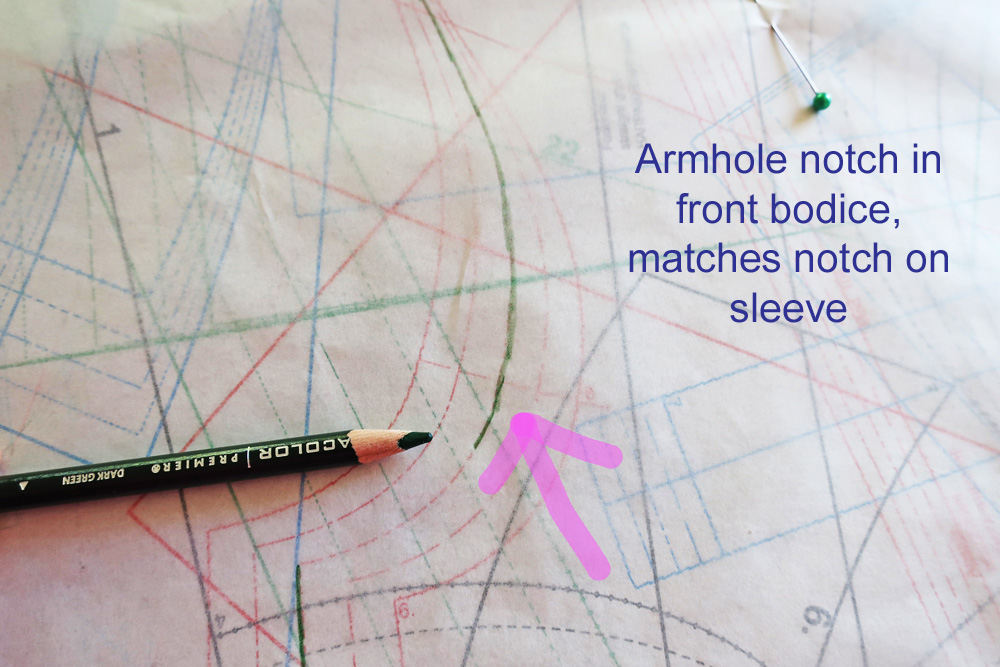
Here I'm tracing the front bodice, it has a single notch which matches a notch in the sleeve. Also there are tiny numbers in various places on the pattern, they are found inside the smallest size of the pattern piece. Below the pencil you can see a tiny numeral 6.
This next picture shows the importance of these little numbers, and why I always put them on my pattern pieces now. Basically they are a little connect-the-dots system! Honestly I kind of kicked myself when I realized how that worked, as I was able to sew the patterns together but this makes it so much easier to figure out which pattern piece is which and where they go. I've put some little color spots to show the system. They are indicated in the instruction page and I now find them so valuable.
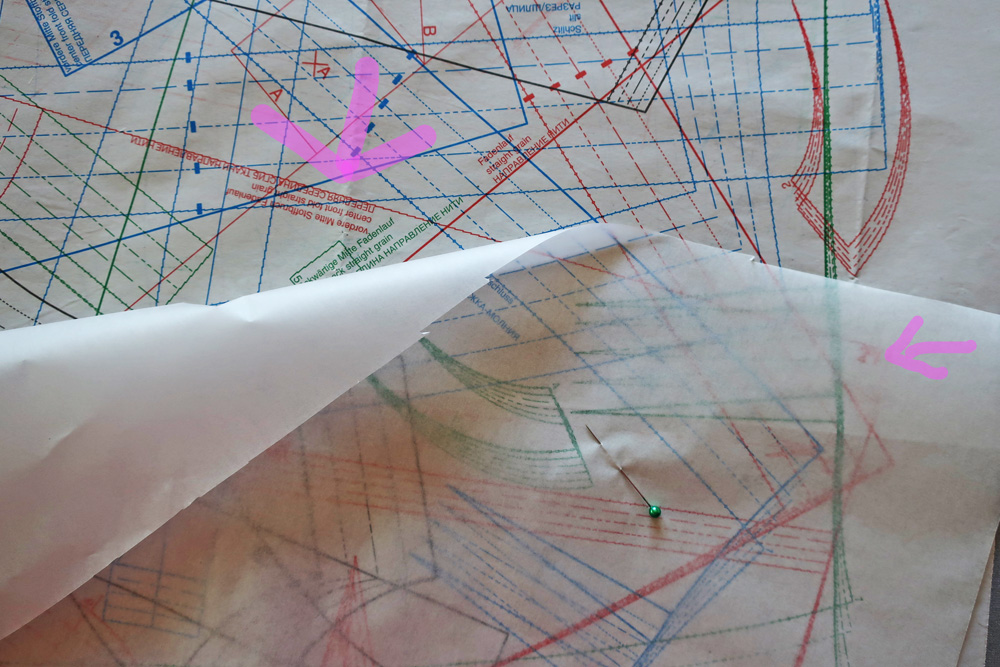
I also find it very helpful to use the landmark of the center front or center back/straight grain which is noted in several languages so it's easy to find that little paragraph and work out where the pattern piece is from that starting point.
One last thing I forgot to photograph, is that as I trace each pattern piece I put a line through the circled edge number, so that I know I've found/traced it and don't end up duplicating my work.
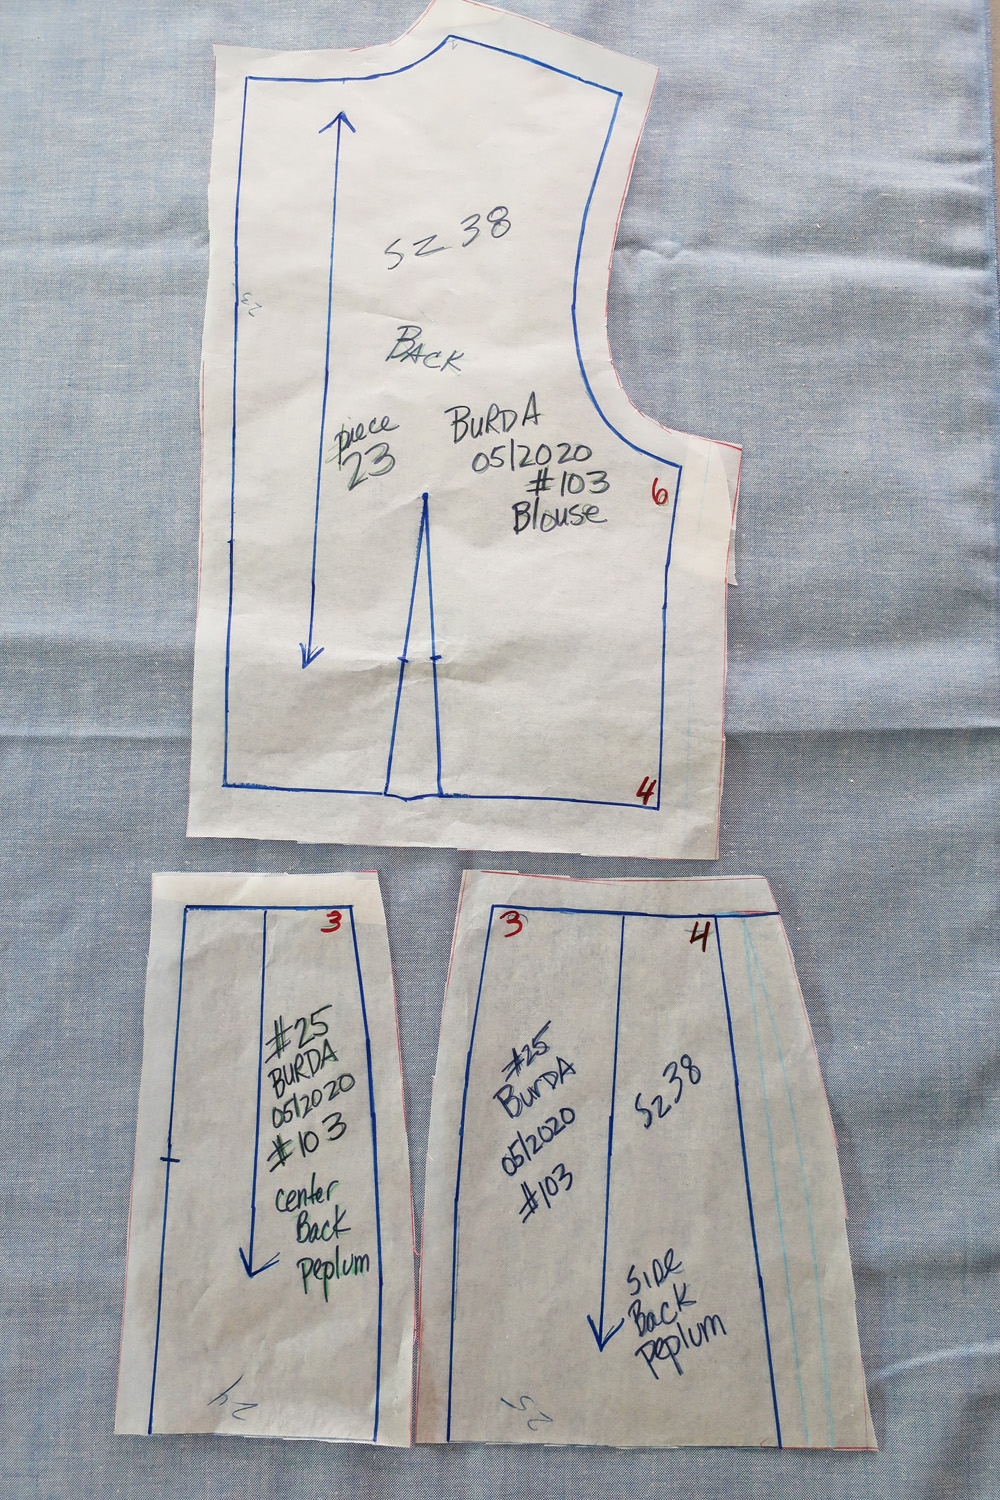
This is what I end up with. I haven't mentioned adding seam allowances - so I will talk about that plus alterations in a separate post. For each pattern piece I write the size I traced, the Piece #, the Month and Year, and any other info I might think of. Also I mark all those little numbers which in my head I call the "join numbers". I've marked these in Sharpie markers so you could see them but usually I use colored pencils which work so well with tracing paper. Plus I end up color coding some of my subsequent alterations.
So that's the scoop on tracing a Burda magazine pattern. As I mentioned, some people might know all this info but most of it I kind of figured out as I went. I would have been happy to have someone tell me all about how to do it :)
Up next, I have finished my denim blazer with matching jeans and looking forward to wearing it despite knowing that it is a... lot of look! I just made some Megan Nielsen Flint shorts, lengthened to be more like culottes and I they are going to be a useful addition to my wardrobe. Despite not needing anything I have succumbed to quarantine boredom and ordered some fabrics which have turned out to be lovely so I'm looking forward to sewing and wearing.
It was 102℉ here today - scorching and it's only May! Fortunately I did a lot of garden work the past two weeks because that's on hold until we cool down a bit.
I hope everyone is well and making it through these strange times. Keep on sewing and posting and I will to - it's been a wonderful distraction to have so many sewing friends around the world making beautiful things.
Happy Sewing,
Beth
today's garden photo - the roses were gorgeous a couple of weeks ago when they put out the big spring bloom. This yellow one is next to the grape which is growing like wild this year and I will hopefully have some grapes in a few months. Plus I picked two zucchini this morning. Time to make some grilled vegetable pizza I think.



0 Yorumlar